Tag Archives: affordable wonders

Survival tools: Tonsillectomy Adenoidectomy & Turbinoplasty: A living nightmare for my 4 Year old daughter

Standard

Image

Photo above is Pre-Op Appt….. Still a happy girl

We are on Day 7 post op of my daughters Tonsillectomy, Adenoidectomy & Turbinoplasty I still haven’t written posts on Days 1 through 6 as I was going to start that today. But 1st I want to list some of the things we’ve tried to easy the pain as I know as a parent when I’m searching for info the 1st thing I want to see is possible methods of relief. Especially since our procedure was done as a last minute change of procedure. We were discharged with VERY BASIC post op info and since we didn’t know we were going to have this procedure done we hadn’t done any research.

Now these are items that we have tried some work some don’t I will list our results. Again this is OUR experience and everyones will be different. Don’t take any of this as medical advice as I have noooo medical background all I have is Mommy background!

  • ENT Doctor discharged us with Tylenol (Acetaminophen)  and Motrin (Ibuprofen) . These maybe great if your child is willing to swallow. Our expierience she spit most out we never knew how much she actually would swallow but I would imagine not enough because pain was non stop but we couldn’t take chances and give her more before next time. We were told to alternate every 4 hours for the 1st few days (at day 7 we are still doing 4 hours to control the pain and stay as ahead of it as possible)
  • My family doctor prescribed us some Tylenol Suppository (Acetaminophen Suppository) now we have the 325 mg ones and they also have the 120 mg this is something your doctor should advise you on again all kids are different age and weight has a lot to do with it. Our daughter is 4 and 48 lbs and we could give her the 325mg every 4 to 6 hours. This was great for us for the 1st 4 days because there was no longer guessing how much she took since it is administered through the rectum (including our extended stay at the hospital more on that on post of day 2). Unfortunately the Ibuprofen doesn’t come this way.  Our daughter quickly became dehydrated and pain wasn’t going away at all!
  • Baths for whatever reason putting her in the warm water would sooth her. Not exactly sure why but she has always been a water baby. I would keep her in one around the clock except for she would fall asleep in there!
  • Driving around also soothes her for some reason. Don’t know if it’s the movement or because she is upright but whatever the reason I feel its worth mentioning.
  • Homemade Ice Packs: I’m sure store bought ones would be good as well. But since I’m kinda housebound I had to do what I could as I googled and googled and googled for relief. Whether you go with store bought or homemade please make sure that they are soft frozen and moldable. The recipe I went with was: 3 parts water 1 part Alcohol. So for example if you use 3 cups of water you will add 1 cup of Alcohol. I had both 50% and 70% alcohol at home and the 70% made more “slush” that lasts longer cold (all night last night and was still cold) From what I’ve read this should only be used for 20 minutes at a time (worth mentioning). Not what I’m doing though. She wants something cold ALL the time on her neck so I’ve made 3 batches of these ice packs which I’ve made bags as little as Snack Size ziplock and as large as gallon size. The best has been the Gallon size since I can mold it around her neck. Yes I already know that this can be a hazard which is why I keep a very close eye on her. When you get to the part where your child is complaining about an “Ear Ache” “My Ear Hurts” You have reached the point that will test you. I’ve been pretty strong but day 5 broke me! This has been the most excruciating part of post op so far. In most cases it’s isn’t an ear infection from all the searches I’ve done. It’s part of the healing process and it’s by all accounts the worst. And in a child like mine with Hypersensitivity this pain is magnified 10 fold. The nerves are all connected I’ve read and it’s not really the Ear that is hurting. The pain is coming from the throat but is being registered by the brain as an ear ache. So even when your auto response would be to apply the ice pack to ear don’t it won’t help instead apply the ice to the throat and you will see her calm down (at least for us this is working) The ear pain seems to be worse when she has to swallow. She soooo wants to eat and drink but when she tries she really suffers EXCRUCIATING PAIN this includes when she has to take her meds. At this point the suppository Acetaminophen isn’t working. We have started giving her Elixir.
  • Another med our family doctor prescribed was Elixir: This is by prescription ONLY! If you didn’t walk out of the hospital with this or another form of strong medicine I would recommend asking for it WAAAAAY before you need it so that you have it on hand when the time comes. We didn’t need to start giving it to her until Day 5. Knowing now what I didn’t know then I probably would have started her on it at the end of Day 4 which is when she started complaining about ear hurting but it still wasn’t excruciating and she had done so well that whole day that I thought we were on our road to pain free recovery instead it was the “Eye of the Hurricane” (will post about that later as well) Again I’m not a doctor PLEASE do not take my experience as medical advise. Your doctor is the only one that would be able to tell you if this med is right for you. Elixir is Acetaminophen with Codeine and is considered a narcotic medicine.  I’m mentioning it because we weren’t given this by our ENT doctor and the only reason I knew this was an option was because of my endless Google searches for answers. Thankfully our family doctor worked with me and provided me with this medicine and the Suppositories which we didn’t even know existed UPDATE: While doing some browsing today on internet I found this article on the FDA website which warns against use of Codeine in children with obstructive sleep apnea (all children but mostly those) Because your liver metabolizes Codiene into Morphine but some people are “Ultra Rapid Metabolizers” and can result in death. So study up on the subject and talk with your doctor Click here for article. A syringe with a catheter Your child may be afraid to swallow or it may hurt to much. We have a giant syringe (got it at the hospital while she was hospitalized so not sure where you can buy one) One of the nurses rigged one up with a long catheter. Remember you have to keep your child’s throat wet. Hard to do when they won’t swallow or drink and in our situation she doesn’t understand us when we say drink to keep your throat wet so you feel better. So with this Syringe we are able to put the catheter in the mouth between teeth and cheek about 1 1/2 inch to 2 inches in and slowly squeeze fluid in doesn’t matter if she swallows we just want to keep her throat wet. Especially when she wakes up. The 1st thing I do when I see it’s time to wake up or she is stirring in bed is start squeezing water in her mouth before she tries to swallow. From what I’ve read about adult experiences waking up and swallowing is the worse and feels like “swallowing a box of thumbtacks” “swallowing a mouth full of broken glass” “Swallowing a box of nails” So knowing this and my daughter doesn’t speak much on a good day due to her speech delay I can only imagine she is feeling this. So even though she hates it and we have to restrain her (she’s really really strong) I still squirt water in her mouth and after a while she relaxes and lets me keep going>.
  • Ear Drops Not sure if this does anything for her but since it’s not an ear ache medically but since mentally to her it’s an ear ache I think it gives her a sense of relief that I address her concerns. The drops I have are over the counter ear drops for ear aches that I had on hand for my son
  • Humidifier or Vaporizer!  Dry throats are a recovering persons worst nightmare so anything at all that you can do to minimize the dry must be done. We don’t have a humidifier but do have a Vicks Vaporizer so I’ve added more than a pinch of salt so that it makes more steam in the room. Not sure if this is a good thing but seems to help my daughter sleep soundly. We still have the irritated throat thing going but at least while she sleeps she sleeps well.
  • A bell and/or baby monitor Another thing I’ve read is to minimize talking (reports from adults) So our daughter speaks very little as it is on a normal day even less now but all her crying is still taking a toll on her throat. I have provided her with a nice bell that rings loudly ours is pewter and even though it’s tiny it rings solidly and loudly so we can hear her in our large house without a problem. And yes sometimes she rings it just to ring that’s ok come to her every single time. She needs you and even though you are beyond exhausted and overwhelmed your baby is too and nothing brings her more comfort than to know you are there.

So this is all I have for now I know I’m long winded but I really want to help someone anyone everyone! But also I’m overwhelmed as well and need to distract myself with what I like to do most… Help people…

Below here is just a repeat to help with search engines and will be on each of my posts:

This will be a very long post or series of post not sure yet how I will post them. I’m not a professional writer so don’t need or want grammatical criticism. I’m simply writing this to get my thoughts and experience out in the open with the hope that my experience will help someone with their child.

The Procedure: Tonsillectomy, Adenoidectomy and Turbinoplasty

Female Age 4 Healthy 48 lbs 3 feet tall

 No two cases will be alike I guess so this isn’t the end all be all nor am I a doctor and do not take these posts as medical advice. Just take it for what it is MY experience. There isn’t much information available that truly describes possible outcomes. Especially in babies and toddlers. In our situation our 4 year old daughter has Developmental Speech delay. By that I mean though she looks like a well developed healthy 4 year old her speech development is that of a 2 year old. She also has very high sensory sensitivity.

Intro: Tonsillectomy Adenoidectomy & Turbinoplasty: A living nightmare for my 4 Year old daughter

Standard
Our Beautiful Girl a day before Surgery.

Our Beautiful Girl a day before Surgery.

This will be a very long post or series of post not sure yet how I will post them. I’m not a professional writer so don’t need or want grammatical criticism. I’m simply writing this to get my thoughts and experience out in the open with the hope that my experience will help someone with their child.

The Procedure: Tonsillectomy, Adenoidectomy and Turbinoplasty

Female Age 4 Healthy 48 lbs 3 feet tall

AWESOME! They asked all the right questions right?!?!?! Read on and find out. I have taken the time to write this post for parents that would like a first hand account of how these surgeries affected my daughter. No two cases will be alike I guess so this isn’t the end all be all nor am I a doctor and do not take these posts as medical advice. Just take it for what it is MY experience. There isn’t much information available that truly describes possible outcomes. Especially in babies and toddlers. In our situation our 4 year old daughter has Developmental Speech delay. By that I mean though she looks like a well developed healthy 4 year old her speech development is that of a 2 year old. She also has very high sensory sensitivity. Meaning everything is magnified sounds are louder, rough textures are rougher, gooey stuff is gooeier (ie, finger paints, jello), some fabrics feel like they are tearing her skin off like sandpaper such as tulle. So naturally pain is also magnified. Due to her limited speech development it has been nearly impossible for her to explain to us what is going on and also for her to understand us when we try to explain things such as “I know it hurts but you have to take these meds to help wit the pain” or “Sweetie you have to drink to keep your throat wet so that it won’t hurt as much”.  Our daughter hasn’t been formally diagnosed with Autism because she does make eye contact, she does make emotional bonds, she does try to play with other people. But in my very unprofessional and uneducated search for answers she does show a lot of similar traits as a child in the Autism Spectrum. So this blog or series of blog posts may also help someone with an Autistic Child

Please follow my posts over the next few days. As I am trying to post during this process in between the few times my daughter isn’t in excruciating pain. I will try to answer questions as they come in as I know first hand how helpless and overwhelming this can be for a parent. But keep in mind I am still helping my daughter through this so I sometimes may not answer right away.

Cheap, Easy and Adorable Halloween Decoration!

Standard

IMG_6532

Hello everyone.

Well I want to start this post with some self Pity 😦 lol Ok So I started writing this post a YEAR ago…. I don’t know how I did it but I wasn’t typing on the same page I am now so I wasn’t able to “Save Draft”  then yesterday I finally had some time on my hands and low and behold my post was GONE!!!! I was BEYOND heart broken. For those of you that don’t know this yet I really do Hate writing. So why keep a blog? Well as much as I hate writing I love helping people even more. So sitting here at home this is the one way I can think of to help as many people as possible!

Well on to today’s post. Halloween is my personal FAVORITE HOLIDAY! Everyone else in my house though loves Christmas (with the exception of my 3 year old daughter) so most of our decorating budget has always gone with Decorating for Christmas. That hasn’t changed I don’t guess…

Soooo last year was the Special year where All of my Halloween decorating started taking the front burner for a change!

With 3 kids at different schools with different needs I have very few minutes to work with so I have to make them count! Today I want to show you a Craft that was literally takes less than 15 min from start to finish and this is doing it with a 3 year old that will surely give you a ton of ideas on what to do with all the extra pumpkins. So the $5 I have listed above as being the cost of this craft is assuming you have the other Items on hand or similar things that can take it’s place.

It is now October 30th and this is my 3 attempt at finishing this post on time!

Materials:

  1. You will need 5 pumpkins (the kind to trick or treat with) to make them exactly like mine
  2. Bamboo stick- I got a bag of them in Walmart in the Gardening section for under 4 bucks (a few years ago)
  3. Hot glue Gun
  4. Duck Tape
  5. Rubber Mallot for staking into the ground
  6. Drill with drill bits that will make holes big enough for the Bamboo  and a second hole big enough to push the lights thru
  7. A Maxwell coffee container lid not sure on the other brands but if you don’t have this. Improvise a “Hat” that will keep water out of the top container.
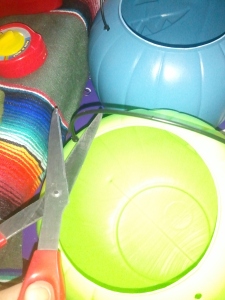
Pumpkins for Trick or Treating from the $1.00 bin at Wally World. Snip off handles and seal the holes so bugs don't make a home out of your hard work! I just used hot glue and a little gem to cover the hole.

Pumpkins for Trick or Treating from the $1.00 bin at Wally World. Snip off handles and seal the holes so bugs don’t make a home out of your hard work! I just used hot glue and a little gem to cover the hole.

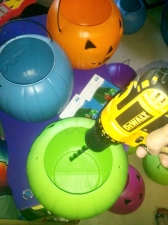
With a drill bit drill 2 holes in the Pumpkin. Hole should be big enough for the Bamboo Stick you chose to fit thru so should be centered the second hole should be next to it and is to thread the string of lights thru each pumkin.

With a drill bit drill 2 holes in the Pumpkin. Hole should be big enough for the Bamboo Stick you chose to fit through so should be centered the second hole should be next to it and is to thread the string of lights through each pumpkin. Do this to all the pumkins.

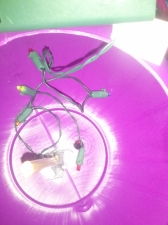
Insides should look like this once you place it thru the bamboo and thread the lights. Make sure you leave a few lights in each pumkin. Divide how many lights you have and how many pumkins then distribute evenly. I used LED lights because they don't get hot so I didn't have to worry about melting the plastic. Also on the 1st one don't slide it all the way down leave about 6 to 12 inches of bamboo exposed so you can use that to stake your tower into the ground.

Insides should look like this once you place it through the bamboo and thread the lights. Make sure you leave a few lights in each pumpkin. Divide how many lights you have and how many pumpkins then distribute evenly. I used LED lights because they don’t get hot so I didn’t have to worry about melting the plastic. Also on the 1st one don’t slide it all the way down leave about 6 to 12 inches of bamboo exposed so you can use that to stake your tower into the ground. I used Duck tape just wrapped around to form a thicker band at the bottom so pumpkins wouldn’t go past it and it also sealed the 1st hole. I also placed duck tape on the inside of the top pumpkin to place pressure on the whole stack. I didn’t want to seal each pumpkin rim to make it easier to remove them if necessary.

Have your handy dandy Toddler help you select the sequence in which they should go on and then she can put them on as you hold the bamboo stick for her :)

Have your handy dandy Toddler help you select the sequence in which they should go on and then she can put them on as you hold the bamboo stick for her 🙂 Making sure that the faces are all facing the direction you want. All of ours are just looking forward 🙂

Last but not least was my situation on how to keep water and critters out but still have access to the top pumpkin so that I could turn on and off the battery box or change dead batteries.  We used the Battery operated lights so that we wouldn't have to deal with plugging in the tower and it even came with a timer switch! Now to fix my situation I turned tooooooo.... You guessed it our love of coffee! We had an empty  coffee container (or 10) laying around and the lid was the perfect color to act as the top of our pumpkin though  it could be spray painted and you could add a stem but then it's no longer a 10 min craft is it!

Last but not least was my situation on how to keep water and critters out but still have access to the top pumpkin so that I could turn on and off the battery box or change dead batteries. We used the Battery operated lights so that we wouldn’t have to deal with plugging in the tower and it even came with a timer switch! Now to fix my situation I turned tooooooo…. You guessed it our love of coffee! We had an empty coffee container (or 10) laying around and the lid was the perfect color to act as the top of our pumpkin though it could be spray painted and you could add a stem but then it’s no longer a 10 min craft is it!

Lastly find a nice spot in your yard for your creation! Looks great by day and by night.... But of course I don't know how to get a decent night shot to show how it glows!

Lastly find a nice spot in your yard for your creation! Looks great by day and by night…. But of course I don’t know how to get a decent night shot to show how it glows!

If you like this post please comment below as that is a bloggers best friend 🙂 It’s what keeps folks like me writing. Share share share and be sure to link back to me 😉

Free Crochet Pattern: Stork Pouch Newborn Photo Prop

Standard

Stork Pouch/ Hanging Cocoon/ Sling For newborn Photo prop Designer: Cristina Barnes Company: Affordable Wonders Copyright, 2011, Cristina Barnes & Affordable Wonders Materials: Hook Size N Bulky Yarn # 5 Darning/ Yarn needle Gauge: 4” x 4”= 5 rows 7 DC Stitch Marker (to keep track of rounds) Abbreviations: DC= double crochet, STS= stitches, DC Dec= double Crochet Decrease, CH= Chain If you need help with any part of this pattern there are video tutorials on http://www.AffordableWonders.com that you can view. All videos are short sweet and to the point! Permission is not granted to copy or distribute this pattern in any manner. Please do not post the instructions for this pattern on any blog or website. Small alterations are still considered part of this pattern. Photos may be posted providing a link to my website where the pattern can be purchased is included. You can also send people to my blog on http://www.affordablewonders.com where they can view the pattern for free. Pattern on website is only for personal use. In order to sell items made by my pattern you must purchase my pattern. I believe that is fair. Thank you for respecting my wishes. To purchase this pattern and download the PDF immediately  Note work in continuous rounds unless otherwise indicated. Place marker on last stitch of every round Start with Magic Ring make 8 DC inside ring place marker on last DC 1) 2 DC in each DC 2) *DC in next ST, 2 DC in next * Repeat around 3) DC in each stitch around 4) *DC in next 2, 2 DC in next* Repeat around 5) DC in each ST around 6) Repeat 5 for 2 rounds 7) DC in 30 STS, DC Dec in last 2, CH 2 turn 8) DC Dec in 1st 2 STS, DC in next 19, DC Dec, CH 2 turn 9) DC Dec in 1st 2 STS, DC in next 17, DC Dec, CH 2 turn 10) DC Dec in 1st 2 STS, DC in next 15, DC Dec, CH 2 turn 11) DC Dec in 1st 2 STS, DC in next 13, DC Dec, CH 2 turn 12) DC Dec in 1st 2 STS, DC in next 11, DC Dec, CH 2 turn 13) DC Dec in 1st 2 STS, DC in next 9, DC Dec, CH 2 turn 14) DC Dec in 1st 2 STS, DC in next 7, DC Dec, CH 2 turn 15) DC Dec in 1st 2 STS, DC in next 5, DC Dec, CH 2 turn 16) DC 7, CH 2 turn 17) Repeat 16 for 19 rows Finish off and weave in ends. Warning: This item is to be used as a photo prop only by a professional photographer. NEVER leave a child unattended in this prop as serious injury or death can happen. I hope you enjoyed this pattern!

HELP! Having a focusing crisis!

Standard

Ok didn’t mean to cry wolf but my brain is so scattered right now that I can’t focus on anything. Heck I’m having a hell of a time focusing on typing this blog…. oh darnit see I almost steered off course again!

So I have the newest addition to my Disney Inspired collection of crochet baby sets and I’m so happy with how it’s turning out. I drew my little stick figure schematics, jotted down my measurements and notes even wrote out the pattern as I was making the prototype. Did everything right! Right? So why am I having trouble with what should be such an easy task at this time. Where all I really have to do is read thru for errors and typos, And add the changes for the other sizes?

So maybe it has a little to do with the weather. Or maybe it’s that I know I should be working on my Quarterly taxes as well as our Federal Income taxes, Or maybe I should be cleaning up my house. But most of all my mind is on my Husband which is about to graduate school and start his own business! I love that he is going to be able to make his dreams come true. (stop on over to his blog to see his progress and to participate in the giveaways! Bogey Repair)

What to do what to do?! How do I get back on track?! I had even shut off my web browser just so that I could focus on the document at hand and yet still as you can see I just opened up the browser to write this blog post!

What do you do when you can’t focus? How do you get back on track?

My Favorite People in the world!

Naturally a Black Bomb Bird Hat has to Follow

Standard

Well after my older son saw the Red Cardinal Angry Birds hats that I made for my Husband and younger Son naturally he wanted his own hat. He requested the Black Bomb Bird. Not needing much of a push to lovingly create something for my son I jumped on it. Now you would think that after creating the Red Cardinal hat I would whip this one up no problem right? Wrong! Lots of frogging went on until I got this hat the way I wanted it.

When I presented it to my son he was sooo happy. Of all the things that I have made my family these hats have been the ones that they have loved the most. All three of my boys (husband included) wear them proudly and brag. That fills my heart with so much joy! My sons wear their hats at all time even indoors lol. And they come home from school excitedly telling me how many people in school love their hat and want one of their own. If you are an Artisan you understand how good it feels when something you made is such a hit.

Well this pattern will be testing soon. If you would like to be a tester for this one leave your comment below. I will need 3 testers.

Well thanks for reading 🙂 have a wonderful day.

Super Cheap and Easy DIY Non-slip socks

Standard

Good Morning! I haven’t been around a lot and that’s because I’ve been super busy! I know no excuse for neglecting my blog!!! But on the bright side I have lots of stuff to add that I believe you will LOVE! So then you’ll forgive and keep comming back :)

On to todays post. I will teach you how to make non-slip socks for little to no money and little to no skills!  I went to Walmart and was going to buy my daughter some non-slip socks but then I saw the price! Not that it was completely going to break the bank but I just couldn’t make myself spend $2.74 on 2 pairs of socks when a 10pk of white socks only costed $3.66! So my frugal wheels started turning. And I remembered that the Puffy paint that my kids decorated a t-shirt with had some resistance. So I got busy to test my theory. Guess what?! It worked!

Now when I say little to no money it’s because most of the people that ready my blog are the craft type (HOORAA!) and more than likely you have all the materials you need in your craft room already. But even if you aren’t the crafty type these are very cheap to make as you only NEED 2 things #1 a packages of socks (doesn’t matter what color or how many that is up to you) and #2 you will need some Puffy Paint (you can find this at Walmart or any craft store) You can buy just one or buy a multipack. So your end project price is up to you! Now on to Optional items: if you are like me you can Crochet or Knit any applique that you want and just sew them on the socks or string some beads or sequins and sew them on. Colorful buttons etc… I’m sure you get the drift by now! You can make these for Boys Girls Men Women babies adults Pets LOL sky’s the limit!

Okay well on to the super complicated instructions to make these bad boys! Grab a pen and paper and take notes lol …. are you ready alright ready or not here we goooooooo.

Step 1: Fold socks width wise with bottom of socks facing you.

Step 2: With puffy paint make dots (or draw a design if you’d like) on bottom of sock to about where the heel is. (be sure to apply a little pressure so that the paint grabs hold of the fibers but not to much pressure that it goes thru the sock)

Step 3: Allow to dry (what I did was make a dot on my work surface so that I could check to see if it was dry)

Step 4: Embelish sock however you’d like!

And that’s it!

Other Ideas ok so lets say you don’t want plain white socks. You can dye them. You can go simple and dump them all in one color or get fancy and tiedye them or use any technique that you’d like.

If yoiu have any other ideas please share with rest us! And if you like this post go ahead and Like share and spread the the word to all of your friends and your friends friends and you ….. Okay I know getting ahead of myself :) I hope you enjoyed the post!


Crochet pattern I created on a whim to decorate my 1st pair.

Chain 6 DC in 2 CH from hook and each across

CH 2 2 DC in 1st DC across 2 DC in last

CH 2 DC in each Stitch

CH 2 DC2TOG DC across to last 2 st, DC2TOG

CH 2 DC across and finish off. weave in ends

Eyes make 2

Majic ring CH 1, 7 HDC in ring SS to join and finish off leaving tail for sewing

Sew eyes on top of “body” one on each corner then put a couple of stitches in between the two eyes to bring them together (will form a small triangle for nose.) Weave in ends

With contrasting yarn attach with SS and SC arount the owl finish off weave in ends. with main color cut 2 strips about 2″ weave them thru a stitch above the Eyes tie knot and trim repeat for other eye.  Sew on to sock!

I think I can, I think I can a tale of My Best Friends Wedding

Standard

This slideshow requires JavaScript.

My best friend is getting married! So over the past couple of weeks I’ve been getting ready for her wedding. My daughter will be her Flower girl, My sons will be her Ring Boys and last but not least I will be her Maid of Honor. Her wedding is on Feb 12 I will be driving to Ohio with my 3 kids! Oh boy Oh Boy how exciting…. In case you missed the Sarcasm in my typing I wanted to make it clear I AM SOOO NOT LOOKING FORWARD TO THE DRIVE! But she is my best friend and has ALWAYS been there for me :)

So with all the stress she has been going thru she hasn’t really thought out the little details liiiiiiike what we are going to do with our hair (daughter and I) So I started looking around for ideas even bought a bridal magazine. I found a few took pics and sent them to her. She picked the ones she liked and then started the next challenge how do I make them.

Being a crafter I always have materials on hand to make just about anything, I make it a habit to purchase things when they are on sale or clearance even though at the moment I may not know what I am going to do with them (does that make me a hoarder!)

So we settled on making rolled fabric roses to put on a headband or clip (still haven’t decided) As I made them I took photos along the way so that I could share what I did with you! :)

Materials: Felt, Headband, ribbon (or any fabric that you want to use) I used 1 and 2 inch ribbon, hot glue gun, lighter (to heat seal ribbon) *feathers, birdcage veil material, crystal beads, beads, rhinestones* from* is optional

1) Cut a piece of felt smaller than the rose will be and round it out to a circle ( I didn’t measure my strips but I did cut several to the same size and some a bit longer)

2) Fold in one end of the ribbon to form a triangle (never really found a great way to do this but it seamed to work) then start rolling the ribbon some until it looks like the center of the rose. Put a healthy dot of hot glue in the center of felt and place the ribbon in it make sure that the “Bud” shape is facing up to make it easier to wrap around it.

2) Now it’s just a matter of twisting and wrapping hot gluing along the way about every other wrap. The tighter you twist the smaller the rose will be. I played around with this and got several different sized roses with the same length of ribbon. All of the felt should be covered if it isn’t trim it before

4) When you are almost at the end give it one last twist and instead of wrapping place the rest of the ribbon to the back and glue in place.

Well I just kept on making these until I ran out of ribbon in several colors just to stash them for future use

5) With ribbon of your choice wrap the headband, with felt cut out a “tear drop” well that’s what I did but you can do circle, square whatever your heart desires and arrange your flower how ever you’d like them and then hot glue them on to felt.

I glued the feather first. Then I gathered the birdcage fabric and hot glued that on top of feathers. Next I glued the flowers and a Hand Beaded Butterfly that I made in the center.

OMG! It was sooo hard to…..

Standard

Yesterday I found a pattern on Ravelry that I liked. When I visited the blog that it was posted on I liked it even more and the Author was so entertaining that I ended up reading everyone of his posts.

If you are a crocheter you know how hard it is to find or come up with a Crocheted item for a man that has some kinds of texture. Usually they end up looking girly. So normally when I create something for a man I knit it (which takes me much longer than just crocheting it)

So after I was done reading all of Tim’s blogs. I went to my stash found some yarn and hook and OMG! I was unable to put the project down after I started… Which btw was late… At about 11:30ish I caught myself asleep well I made a few more stitches and whaddayaknow I was asleep again! Well after waking up several times I decided I had to put it down for the night. This morning I finished it all of my kids loved and above are the photos.

I did change a few things but that was because I was working with what I had (pattern calls for Chunky yarn I used WW) and my dislike for SC’s.  As you can see everyone LOVES this hat and the way that it is designed it has lots of stretch to it for big heads like mine and will grip small heads like my 3 year old daughter!

Now on to the designer. His name Tim and his Blog is Man-Made…LOVE his sense of humor! And what I love more is he is a Man that Crochets. He  even helps his Wife with projects! (what I wouldn’t give for my Husband to join me one day) Tim grew up around crocheters and knitters and clearly has and appreciation for the Art. He has only been actively crocheting for a few months and is already designing so can you imagine him in a few years! I see a book in the making! Well if you would like to try this pattern out Click here Deep Woods Explorer Cap He also has matching Fingerless Gloves and HERE is his Ravelry project page so you can Hook it  tonight!

My Rendition of Angry Birds Inspired Hat Red Cardinal

Standard

So I designed this hat for my husband. 1st time ever that he has actually requested something crocheted. Went something like this. “Wouldn’t it be cool if you could make an Angry Birds Hat. I would totally wear it everywhere” I didn’t know what to do with myself! I ran tripped over my feet and fell on some red yarn…. Ok maybe not but I stopped everything and  started working on his hat. I know there are several patterns out there for the hat but 1) I prefer to design my own patterns and 2) well I didn’t really see any patterns that I liked.

Well it took me a few days to get it to where I liked it. I wanted the hat to have earflaps but I wanted the earflaps to be more “bomber” style and I didn’t add braids as I just don’t really like that look on men. After I assembled all the pieces. My youngest son caught a glimpse of the hat next thing I know he asked me for one as well. You’ll notice that my sons hat has a beige belly he requested it to be that way (don’t ask me why cause I have noooo idea)

Well after I finished the hats both my Husband and Son absolutely love them. They proudly wear them and brag 😉

So I ask you which do you think looks better. White or Beige belly?

At the moment this pattern is being tested by 3 wonderful ladies but will be out soon. And if you don’t crochet and would like a hat I will also be taking orders for them.